
Hey there! As a supplier of IR optics, I've seen a lot of different ways these optics can be mounted. And let me tell you, choosing the right mounting method is super important. It can affect how well your IR optics work, how easy they are to use, and even how long they last. So, in this blog, I'm gonna break down the different mounting methods for IR optics and give you the lowdown on each one.
1. Fixed Mounting
Fixed mounting is probably the simplest and most straightforward way to mount IR optics. With this method, the optics are attached to a stable surface, like a wall, a tripod, or a vehicle, and they stay in one place. This is great for applications where you need a stationary view, like monitoring a specific area or a piece of equipment.
One of the biggest advantages of fixed mounting is its stability. Since the optics are firmly attached, there's less vibration and movement, which means you'll get a clearer and more consistent image. It's also relatively easy to set up. You just need to find a suitable location, drill a few holes if necessary, and secure the optics in place.
However, fixed mounting also has its limitations. Once the optics are installed, it can be difficult to change their position or angle. If you need to adjust the view, you might have to physically move the entire mounting structure, which can be time-consuming and sometimes even impossible.
2. Adjustable Mounting
If you need more flexibility, adjustable mounting is the way to go. This method allows you to change the position, angle, and orientation of the IR optics. There are different types of adjustable mounts, such as pan-tilt mounts and gimbal mounts.
Pan-tilt mounts let you move the optics horizontally (pan) and vertically (tilt). This is really useful for applications where you need to scan a large area or follow a moving object. You can easily adjust the view by using a control panel or a remote control.
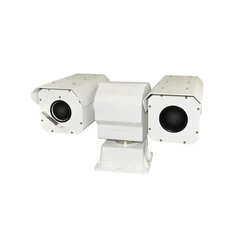
Gimbal mounts, on the other hand, provide even more freedom of movement. They can rotate in multiple axes, which means you can point the optics in almost any direction. Gimbal mounts are often used in airborne or mobile applications, like drones or vehicles, where the platform is constantly moving.
The main advantage of adjustable mounting is its flexibility. You can quickly adapt the view to different situations and requirements. But it also comes with some drawbacks. Adjustable mounts are usually more complex and expensive than fixed mounts. They also require more maintenance to ensure smooth operation.
3. Handheld Mounting
For applications where you need to move around a lot or have a more personal view, handheld mounting is a popular choice. With this method, the IR optics are designed to be held in your hand, just like a camera or a pair of binoculars.
Handheld IR optics are great for activities like hunting, surveillance, and search and rescue. They're portable and easy to use, and you can quickly aim them at different targets. You can also get a closer look at objects by simply walking up to them.
However, handheld mounting also has some challenges. Holding the optics steady can be difficult, especially if you're moving or in a windy environment. This can result in a shaky image. And since you're holding the optics with your hands, your arms can get tired after a while, which can affect your ability to use them effectively.
4. Vehicle Mounting
If you're using IR optics in a vehicle, like a car, a truck, or an aircraft, vehicle mounting is essential. There are different ways to mount IR optics on a vehicle, depending on the type of vehicle and the specific application.
For cars and trucks, the optics can be mounted on the dashboard, the windshield, or the roof. Dashboard mounts are convenient because they're within easy reach, but they can also block your view. Windshield mounts provide a good view, but they can be affected by reflections and vibrations. Roof mounts offer a higher and wider view, but they're more exposed to the elements.
In aircraft, IR optics are often mounted on the fuselage or the wings. These mounts need to be designed to withstand high speeds, vibrations, and extreme temperatures. They also need to be aerodynamically efficient to minimize drag.
Vehicle mounting has the advantage of providing a stable platform for the IR optics while allowing you to move around. But it also requires careful planning and installation to ensure that the optics are properly aligned and secured.
Examples of Products Using Different Mounting Methods
Now, let me give you some examples of products that use these different mounting methods.
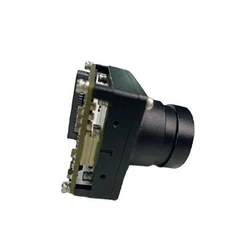
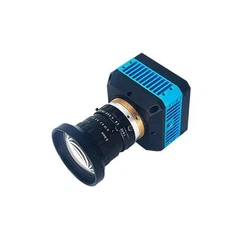
- Nework Uncooled Thermal Image Core a-Si sensor: This product can be used with a fixed mount for stationary monitoring. Its high-quality sensor provides clear thermal images, and when mounted in a fixed position, it can continuously monitor a specific area.
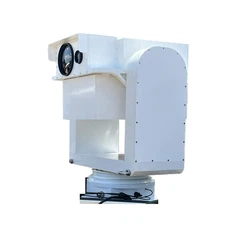
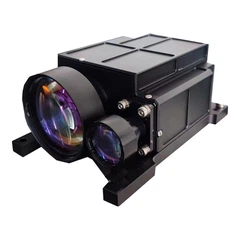
- High-performance Multi-spectrum EO ISRT System for Airborne Missions: This system is designed for airborne applications, so it uses a gimbal mount. The gimbal allows the optics to rotate in multiple axes, providing a wide range of views even when the aircraft is moving.
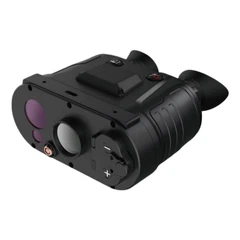
- 384 640 Thermal Night Vision Goggle: As the name suggests, this is a handheld device. It's perfect for activities like hunting and surveillance, where you need to move around and have a personal view.
Conclusion
As you can see, there are different mounting methods for IR optics, each with its own advantages and disadvantages. The right mounting method depends on your specific application, requirements, and budget. Whether you need a fixed view, more flexibility, portability, or a vehicle-mounted solution, there's a mounting method that's right for you.
If you're interested in purchasing IR optics or have any questions about the different mounting methods, feel free to reach out to us. We're here to help you find the best solution for your needs.


References
- Smith, J. (2020). "Guide to IR Optics Mounting." Optics Journal.
- Johnson, A. (2021). "Advances in Adjustable Mounting for Thermal Imaging." Thermal Imaging Magazine.