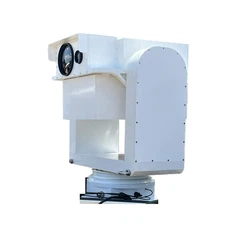

Connecting the 640 Middle Range Dual Spectrum PTZ System to a network is a crucial step for users who want to leverage the full capabilities of this advanced surveillance equipment. As a supplier of the 640 Middle Range Dual Spectrum PTZ System, I am here to guide you through the process in a detailed and straightforward manner.
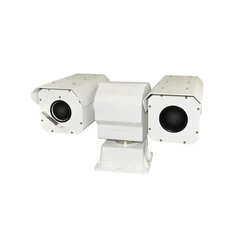
Understanding the 640 Middle Range Dual Spectrum PTZ System
Before diving into the connection process, it's essential to understand what the 640 Middle Range Dual Spectrum PTZ System offers. This system combines high - resolution visible light and infrared imaging, allowing for clear monitoring in both day and night conditions. The Pan - Tilt - Zoom (PTZ) functionality provides a wide range of coverage, enabling users to focus on specific areas of interest.
Prerequisites for Network Connection
- Network Infrastructure: Ensure that you have a stable and reliable network infrastructure in place. This includes a functioning router, Ethernet cables, and a proper power supply for all network devices.
- IP Address Configuration: The 640 Middle Range Dual Spectrum PTZ System requires a unique IP address within your network. You can either use a static IP address or configure it to obtain an IP address automatically via DHCP (Dynamic Host Configuration Protocol).
- Network Security: Implement appropriate network security measures, such as firewalls and encryption, to protect your system from unauthorized access.
Step - by - Step Guide to Connecting to a Network
Step 1: Physical Connection
- Power On the System: First, connect the 640 Middle Range Dual Spectrum PTZ System to a power source and turn it on. Wait for the system to boot up completely.
- Ethernet Connection: Use an Ethernet cable to connect the system to your local network switch or router. Make sure the cable is securely plugged in at both ends.
Step 2: IP Address Configuration
- Access the Configuration Interface: You can access the system's configuration interface through a web browser. Open your preferred web browser and enter the default IP address of the system in the address bar. If you are using DHCP, the system will automatically obtain an IP address, and you may need to check your router's DHCP lease table to find the assigned IP.
- Static IP Configuration: If you prefer to use a static IP address, log in to the system's configuration interface using the default username and password. Navigate to the network settings section and enter the desired static IP address, subnet mask, gateway, and DNS server addresses.
Step 3: Network Testing
- Ping Test: After configuring the IP address, perform a ping test to check if the system is reachable on the network. Open the command prompt on your computer and type "ping [IP address of the system]". If you receive replies, it means the system is successfully connected to the network.
- Web Access Test: Try accessing the system's web interface again using the configured IP address. If you can log in to the interface, it indicates that the network connection is working correctly.
Step 4: Integration with Network Video Recorders (NVRs) or Monitoring Software
- NVR Configuration: If you are using a Network Video Recorder (NVR), add the 640 Middle Range Dual Spectrum PTZ System as a new camera in the NVR's configuration settings. Enter the IP address, username, and password of the system to establish a connection.
- Monitoring Software: For users who prefer to use monitoring software, follow the software's instructions to add the system as a camera source. The software will typically prompt you to enter the necessary connection details, such as the IP address and authentication credentials.
Troubleshooting Network Connection Issues
- Check Physical Connections: Ensure that all Ethernet cables are properly connected and that there are no loose connections. You can also try replacing the Ethernet cable if you suspect it is damaged.
- IP Address Conflicts: If you are experiencing IP address conflicts, check your network to ensure that no other devices are using the same IP address. You can either change the IP address of the system or the conflicting device.
- Firewall and Security Settings: Review your network's firewall and security settings to make sure that they are not blocking the connection to the 640 Middle Range Dual Spectrum PTZ System. You may need to create exceptions or rules to allow the system to communicate on the network.
Related Products and Their Specifications
If you are interested in learning more about related products, you can refer to the following links:
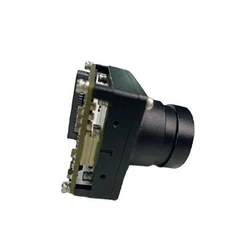
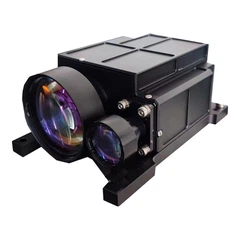
- CMPT6 MW IR Camera Specifications: This link provides detailed specifications of the CMPT6 MW IR camera, which may complement the 640 Middle Range Dual Spectrum PTZ System.
- Long - range Uncooled Pan&Tilt Camera PTD Series: The PTD series offers long - range uncooled pan - tilt cameras that can be used in various surveillance applications.
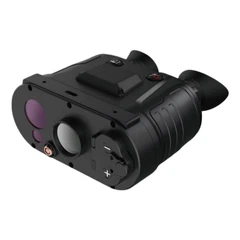
- Special Purpose Handheld Lightweight: This link showcases special - purpose handheld lightweight thermal imaging equipment that can enhance your surveillance capabilities.
Conclusion
Connecting the 640 Middle Range Dual Spectrum PTZ System to a network is a relatively straightforward process if you follow the steps outlined above. By ensuring a stable network connection, you can fully utilize the system's features, such as remote monitoring and recording. If you have any further questions or need assistance with the connection process, please feel free to contact us for more information. We are always ready to help you make the most of our 640 Middle Range Dual Spectrum PTZ System. Whether you are a small - scale business owner looking to enhance security or a large - scale enterprise in need of comprehensive surveillance solutions, our system can meet your requirements. Reach out to us to start a procurement discussion and find the best configuration for your specific needs.


References
- Manufacturer's Manual for the 640 Middle Range Dual Spectrum PTZ System
- Network Configuration Guides for Surveillance Systems
- Industry Best Practices for Network - Connected Surveillance Equipment