


How to use a handheld thermal imager
1. Understand the principles of thermal imaging cameras
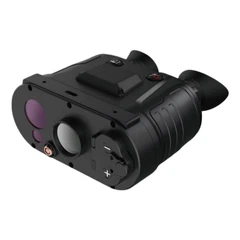
A handheld thermal imager is a device that captures images of the temperature distribution on an object's surface through an infrared lens. Its working principle is based on infrared radiation, which detects temperature differences through infrared signals emitted from the surface of an object, thereby forming a temperature image.
2. Operating the thermal imager
First, turn on the power switch of the thermal imager and wait for 1-2 minutes to warm up before use. During the measurement process, it is necessary to align the target object and ensure that the lens is facing the target area. At the same time, when measuring, the viewing angle of the thermal imager needs to be placed horizontally to ensure the accuracy of the measurement results. It should be noted that when using a thermal imager, you need to use a handle or a tripod to stabilize the device to avoid data errors.
3. Understand the software interface
Handheld thermal imagers are generally equipped with special software, which transfers data between the thermal imager and the computer through a USB interface. The software interface generally includes temperature measurement, image browsing and other modules. Users need to understand and master the software operation methods so that they can complete the measurement task more conveniently and quickly.